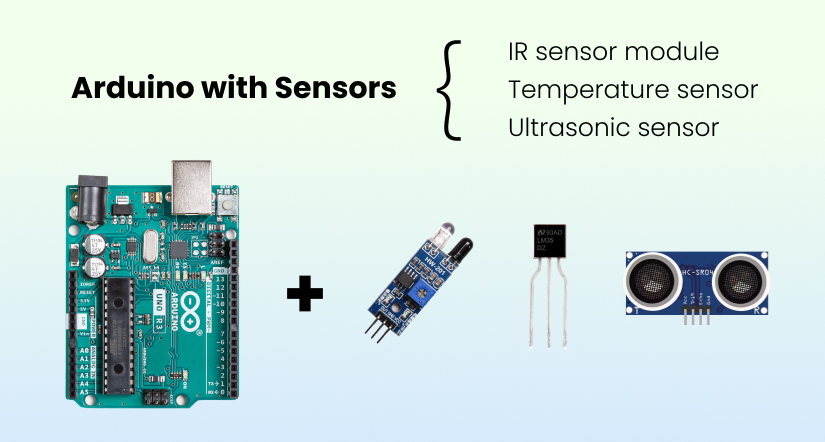

Arduino Uno
Step: 1
Interfacing IR sensor module with Arduino

An infrared sensor can detect movement as well as to measure the heat of an object. The Infrared Sensor can detect infrared radiation, which is invisible to our eyes. An infrared sensor is a photodiode that is sensitive to infrared light. IR Sensor Pinout

VCC – The power supply pin for the IR sensor which we connect to the 5V pin on the Arduino. OUT – This pin is a 5V TTL logic output. LOW indicates no motion is detected; HIGH means motion is detected. GND – Should be connected to the ground of the Arduino.
How does IR Sensor module work?
The working of the IR sensor module is very simple, it consists of two main components: the first is the IR transmitter section and the second is the IR receiver section. In the transmitter section, IR led is used and in the receiver section, a photodiode is used to receive infrared signal and after some signal processing and conditioning, you will get the output.
IR Sensor and LED with Arduino Uno – Connection Diagram
We connected the LED positive leg to the port D13 and negative leg to the GND.IR sensor having 3 pins. GND pin connected to GND in Arduino. VCC pin connected to the 5V port and OUT pin connected to D2 pin at the Arduino board.

const int led=13; const int IR=2; void setup() {
// put your setup code here, to run once: Serial.begin(9600); pinMode(led,OUTPUT); pinMode(IR,INPUT);
} void loop() {
// put your main code here, to run repeatedly:
int read=digitalRead(IR); if(read==1){
Serial.println(“light off”); digitalWrite(led,LOW);
} else{
Serial.println(“light on”); digitalWrite(led,HIGH);
}
To use IR sensor as Toggle button. When one-time interrupted LED will blink (ON mode). next time interrupted to LED off (OFF mode). const int buttonPin = 2; const int ledPin = 13;
int buttonPushCounter = 0; int buttonState = 0; int lastButtonState = 0;
void setup()
{
pinMode(buttonPin, INPUT_PULLUP); pinMode(ledPin, OUTPUT);
Serial.begin(9600);
} void loop()
{ buttonState = digitalRead(buttonPin); if (buttonState != lastButtonState)
{ if (buttonState == HIGH)
{ buttonPushCounter++;
if(buttonPushCounter % 2 == 0)
{
Serial.print(“Count”);
Serial.println(buttonPushCounter/2);}
} delay(10);
}
lastButtonState = buttonState; if (buttonPushCounter % 2 == 0)
{
digitalWrite(ledPin, HIGH);
} else { digitalWrite(ledPin, LOW);
}
}
Step: 2
Interfacing Temperature sensor (LM 35) with Arduino

A temperature sensor is a device used to measure temperature. This can be air temperature, liquid temperature or the temperature of solid matter. There are different types of temperature sensors available and they each use different technologies and principles to take the temperature measurement.
Temperature Sensor Pinout
+Vs – The power supply pin for the IR sensor which we connect to the 5V pin on the Arduino. Vout – This pin is a 5V TTL logic output. LOW indicates no motion is detected; HIGH means motion is detected. Gnd – Should be connected to the ground of the Arduino.
How does Temperature Sensor module work?
A temperature sensor is a device, typically, a thermocouple or resistance temperature detector, that provides temperature measurement in a readable form through an electrical signal. A thermometer is the most basic form of a temperature meter that is used to measure the degree of hotness and coolness.
Temperature Sensor with Arduino Uno – Connection Diagram
Temperature sensor having 3 pins. GND pin connected to GND in Arduino. +Vs pin connected to the 5V port and Vout pin connected to A0 pin at the Arduino board.

To find the temperature and convert into Celsius and Fahrenheit.
//formulas
/*Vout = (reading from ADC) * 0.48828125;//analog voltage to temperature in Celciuse Temperature (°C) = Vout * 100 celsius to faranheat—->(C * 9.0 / 5.0) + 32.0;
*/ int SEN=0; void setup() {
Serial.begin(9600);
}
void loop() {
double read=analogRead(SEN); Serial.println(read);
double tempC=read*0.48828125;//analog voltage to temperature equivalent double tempF=(tempC * 9.0 / 5.0) + 32.0;/*converting cencius into faranhit*/
//print tempC and tempF
Serial.print(“Temperature=”);
Serial.print(tempC);
Serial.print(“xC2xB0”); // shows degree symbol
Serial.print(“C | “);
Serial.print(tempF);
Serial.print(“xC2xB0”);
Serial.println(“F”);
delay(1000);}
Step: 3
Interfacing Ultrasonic sensor with Arduino

An ultrasonic sensor is an instrument that measures the distance to an object using ultrasonic sound waves. An ultrasonic sensor uses a transducer to send and receive ultrasonic pulses that relay back information about an object’s proximity. The HC-SR04 ultrasonic sensor uses SONAR to determine the distance of an object just like the bats do. It offers excellent non-contact range detection with high accuracy and stable readings in an easy-to-use package from 2 cm to 400 cm or 1” to 13 feet.The operation is not affected by sunlight or black material, although acoustically, soft materials like cloth can be difficult to detect. It comes complete with ultrasonic transmitter and receiver module.
Ultrasonic Sensor Pinout

VCC – The power supply pin for the IR sensor which we connect to the 5V pin on the Arduino. Trig – Sends ultrasonic pulse. Echo – Receives the reflected ultrasonic pulse. Gnd – Should be connected to the ground of the Arduino.
How does Ultrasonic Sensor module work?
temperature sensor is a device, typically, a thermocouple or resistance temperature detector, that provides temperature measurement in a readable form through an electrical signal. A thermometer is the most basic form of a temperature meter that is used to measure the degree of hotness and coolness.
Ultrasonic Sensor with Arduino Uno – Connection Diagram
Ultrasonic sensor having 4 pins. GND pin connected to GND in Arduino. VCC pin connected to the 5V port and Trig connected to D3 pin and Echo connected in D2 pin at the Arduino board.

To find the distance when an interrupt happens at a distance.
const int trig=33;
const int echo=32;
long dur;
int dist;
void setup() {
Serial.begin(9600);
pinMode(trig,OUTPUT);
pinMode(echo,INPUT);
}
void loop() {
digitalWrite(trig,LOW); //clear the trigpin
delayMicroseconds(2);
digitalWrite(trig,HIGH); //HIGH for 10 sec
delayMicroseconds(10);
digitalWrite(trig,LOW);
dur=pulseIn(echo,HIGH); // Reads the echoPin, returns the sound wave travel time in microseconds
dist=dur*0.034/2; //The speed of ultrasonic sound in air is
Serial.print(dist);
Serial.println(” centimeter”);
}